Using Soft Recorder for Speaking Homework.
Step
1
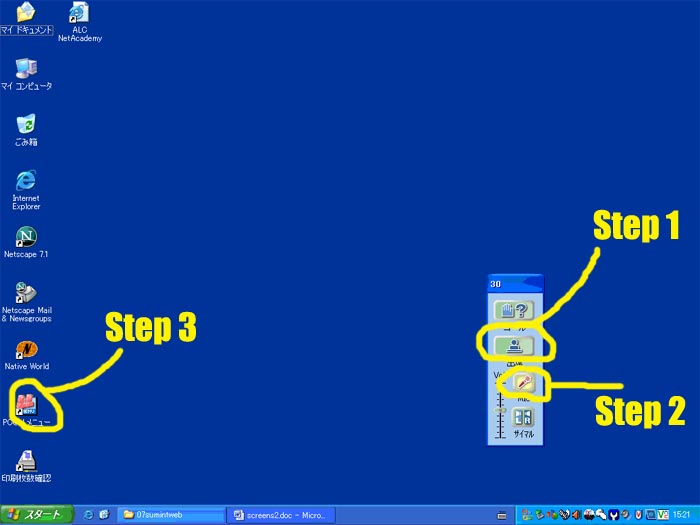
Click on the shuuseki button.(see
image
1)
Step
2
Click on the microphone button. (see
image
1)
Step
3
Click on the soft recorder icon. I
always think it looks like two
spidermen. (see image
1)
image
1
Step
4
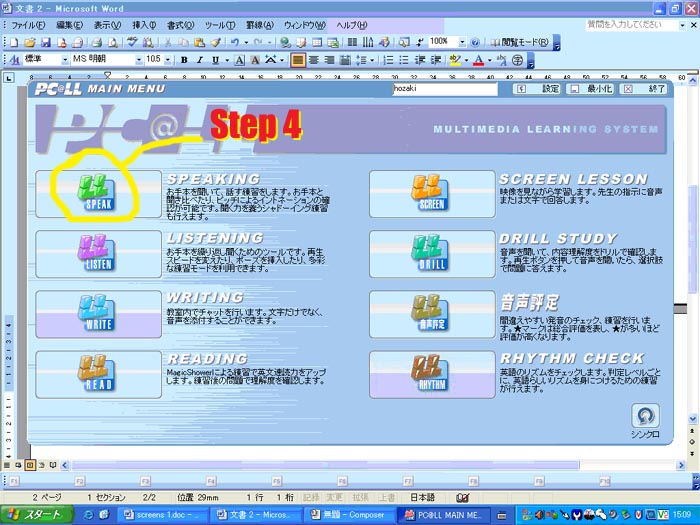
When Soft
Recorder opens,click on
the button that says Speak. (see image
2)
image
2
Step
5
Make sure
you understand the Soft Recorder control panel.(see
image
3)
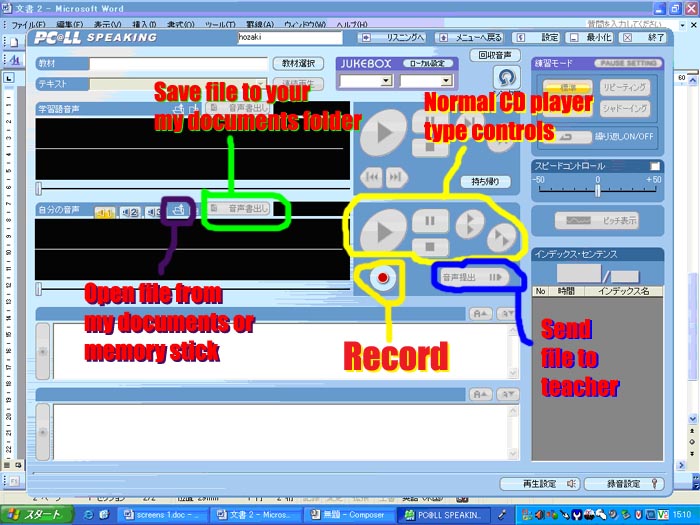
There are four main controls we shall be using.
1) Circled in yellow are the Record button, and normal CD
type controls (Play, Stop, Pause)
2)
Circled in green
is the Save file button.
This saves your recording to your My Documents folder (or to a memory
stick).
3)
Circled in blue
is the Send to teacher button.
aThis sends your recording to an electronic collection box which your
teacher can access.
4)
Circled in purple
is the Open file from folder
button. This is how
you open a file you have previously saved.
image
3
Step
6
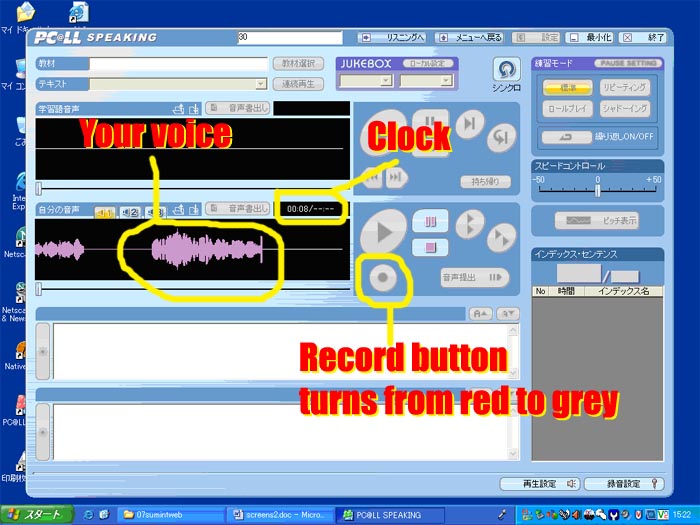
Click on
the Record button.
Notice it changes from red to grey. When it is grey it means your are
recording.(see
image
4 )
Also notice that you will see a pink fuzzy movement in the panel to the
left of the record button when you are speaking. This is Your voice. If you do not see
this when you are speaking, it means your microphone is switched off or
broken. Change to another computer if this happens.
Very,
very important!!! Remember to watch the Clock as you are speaking.
Rember you only have 45 seconds for a independent speaking task and 60
seconds for an integrated speaking task.
image
4
Step
7
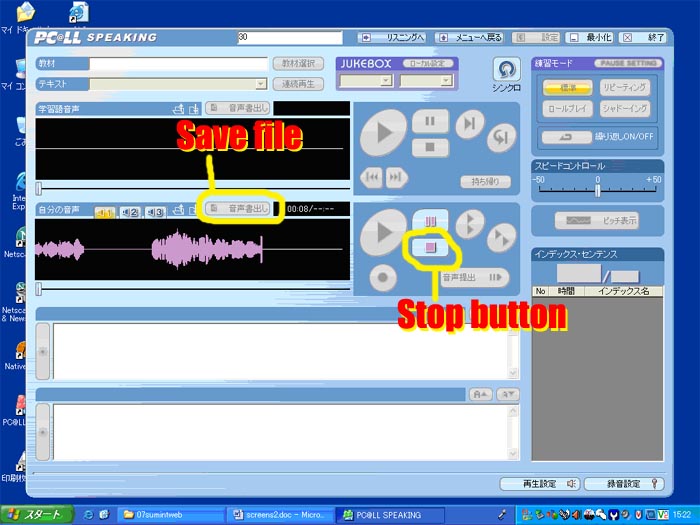
Click the Stop button to stop recording.(see
image
5)
Step
8
Click the Save file button to save your
file to your my documents folder or a memory stick.(see
image
5)
image
5
Step
9
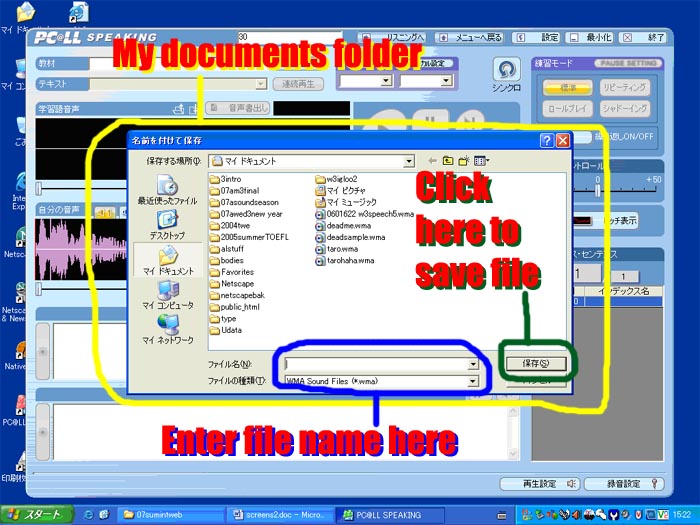
After you
click the Save file button,
your my documents folder
will appear. You type in the name of the file you want to save.(see
image
6)
Very,
very important!!!Make
sure you do not click the record button by mistake or you will record
over your speech and it will be lost.
Step
10
After you
type in the file name, click the Save
(•Û‘¶) button and the file is saved. (see
image
6)
image
6
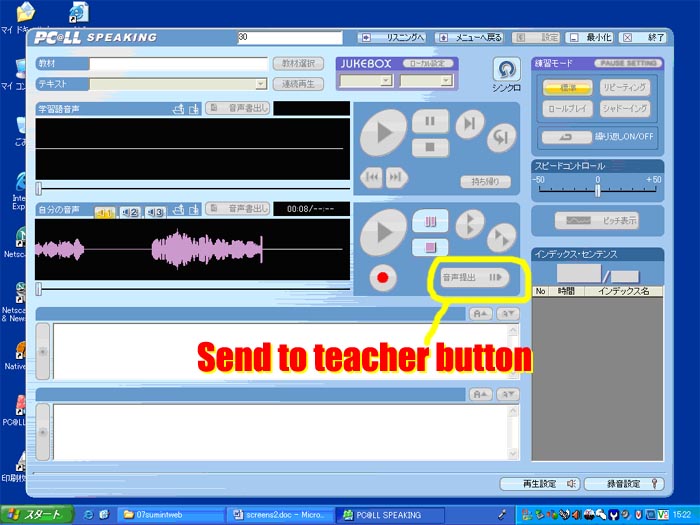
Step11
Click the Send button to send your speech
to the teacher.(see
image
7)
image
7
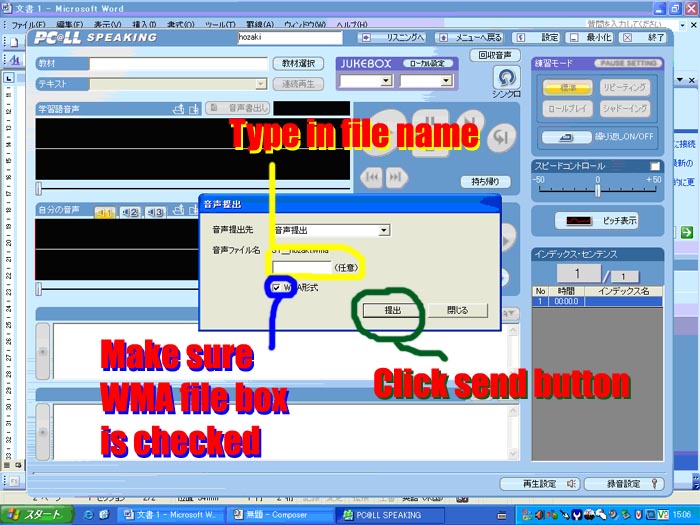
Step
12
The send file dialogue box will now
appear. Type in your file name.(see
image
8)
Step
13
Make sure
the WMA box is checked.(see
image
8)
Step
14
Click the send button.(see
image
8)
image
8
Very
Important!!!!
Please save
every file you record in this class. Many of them you will need to do
your homework.


